It has been over two months since I finished the Autumn guitar, but I’ve been unable to make updates to the blog, or progress in any of my other projects. Y’now, work ‘n stuff. I hope to be more consistent from now 🙂
But let’s go it, shan’t we? This second step in the construction is almost immediate to conditioning the soundboard. Typically, you would have to cut and carve the braces before installing them, but the Madinter kit provided some of pretty good quality. In future projects, I will have the chance to do my own but in this case, I used them.
Braces are made almost exclusively of spruce, as they offer the best results, being a light wood that has fair rigidity and great resonance. After all, their role is to provide a supportive structure, without reducing the vibration of the top sound board, while increasing the overall strength.
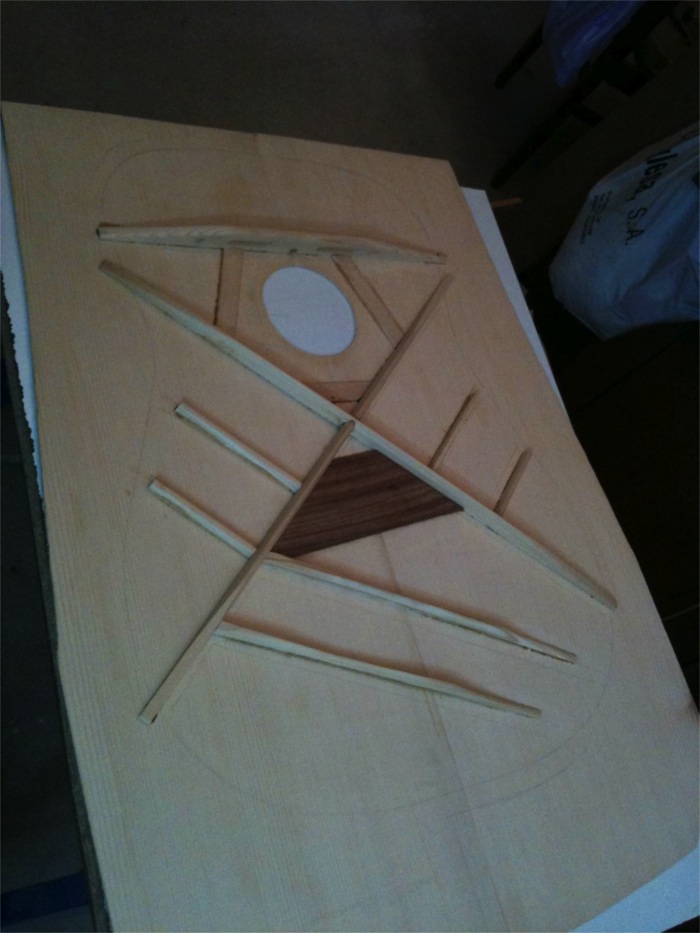
In this case, as in most steel string acoustic guitars, I use a patter in ‘X’ (x bracing) and are partially scalloped. This is basically that in the part that is exposed, opposite to the side glued to the top, arches are carved, lightening parts and giving more flexibility and other properties that physics would probably explain better.
As seen in the pictures, cut and carve the braces to the appropriate size and shape, with flat tapered extremes. The grain should be along and parallel to the top. Tapered ends will connect with the sides only in a small area, allowing for better vibrating.
The method of gluing (with Titebond) is simple but effective. The lid has to stand on a flat surface clear of chips, so that there is no damage. Using battens and clamps to apply pressure points and secure onto the soundboard. Be careful to use the right amount of glue, and avoid burrs. Here is the process, with some bars already in place:
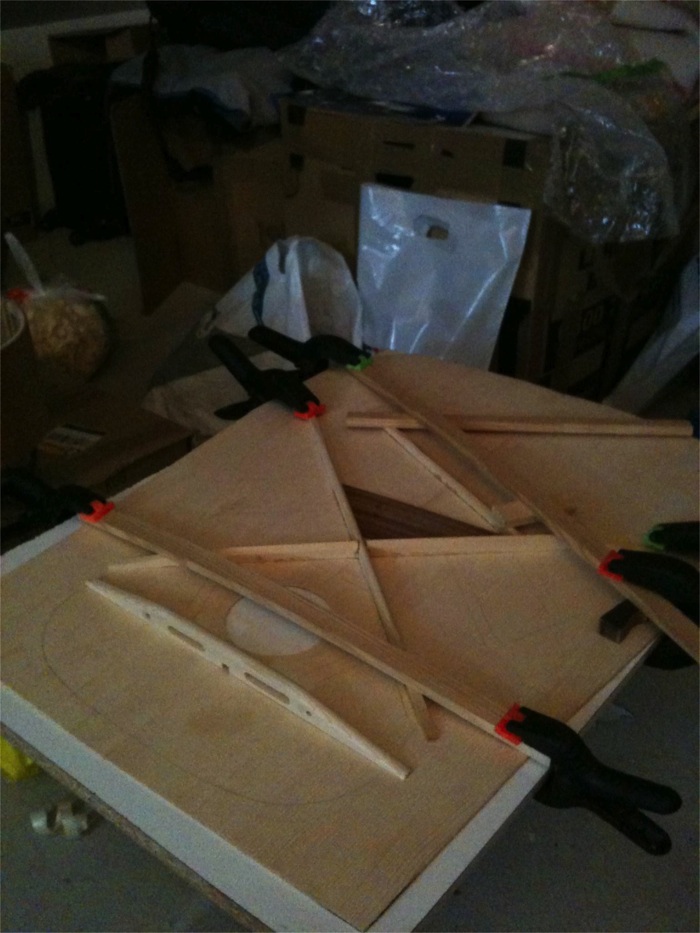
Gluing the sound bars and braces to the guitar top (1)
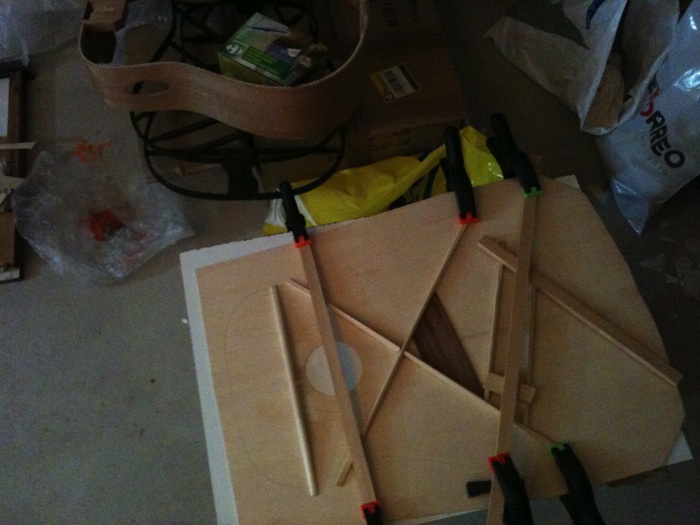
Gluing the sound bars and braces to the guitar top (2)
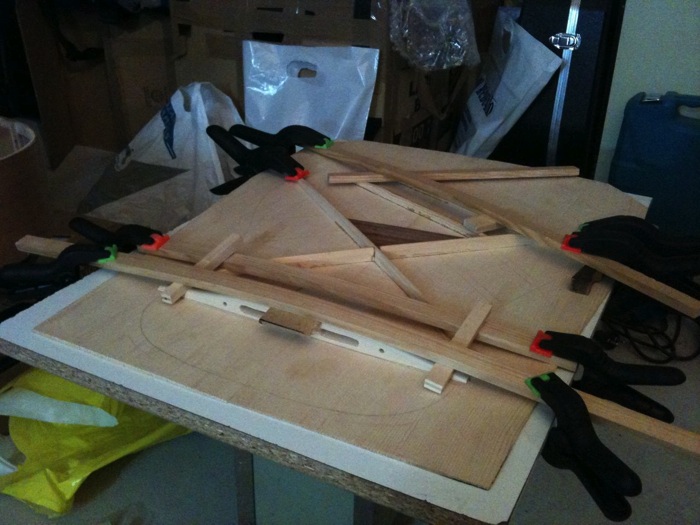
Gluing the sound bars and braces to the guitar top (3)
As you can see, there is a clear pattern in the form of ‘X’ in the longer strips, which are centered on the area where the bridge should be located. Therefore, besides the braces, a slat is glued. It is triangular and flat, about 3-4 mm thick of rosewood (or similar hard wood) to serve as reinforcement in this area, as it has to withstand much stress, and the string pins. But we’ll see.
The shape of the braces, can vary. As shown, the ends are tapered to reduce the thickness to a few millimeters. This will be the single supporting point with the sides of the guitar body. Of all the braces, only the main ones (in ‘X’) and the top nearest to the neck (and sound hole) touch the sides. The others, the tone-bars, stop before reaching the sides, carved to almost nothing.
In these pictures cannot really be seen (sorry), but once glued, the braces are carved with the chisel and gouges. When to stop carving is hard to say… you have to appreciate is “right” (by feeling). They should be light and let the top ring. This is one of the points where the talent of the luthier counts the most. Myself, I followed my instinct, my ear, lots of people’s photos and perhaps, prudence. The result, well, was not so bad.
Glued braces, ready for carving

Craved braces ready for installing on the body sides
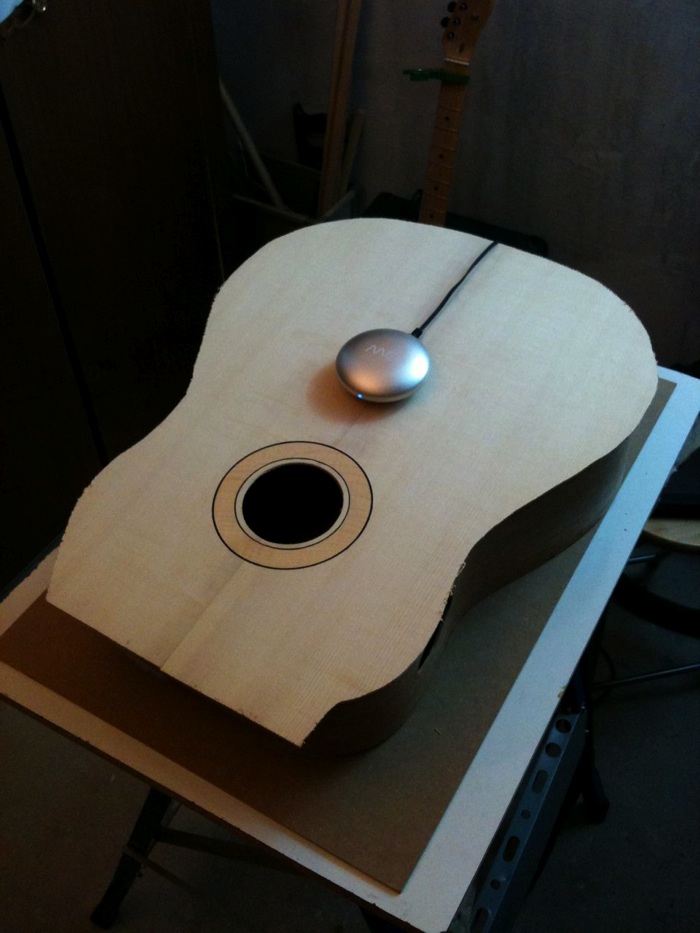
Testing the vibration of the guitar top with a vibration-transmiting speaker
Finally, intending to reassure my insecurities, I used a device to see how the top ‘sounded’… It is a curious speaker that uses the surface where it rests to transmit vibrations and cause them to produce sound. Nothing scientific, I’m afraid, but sounding pretty good, my conscience was somewhat reassured … 🙂
Quiz – For those interested, there is a technique that is based on spreading particles (graphite??) on the surface and applying sound waves to see the shapes that are created and so ‘refine’ the top better.


Recent Comments